
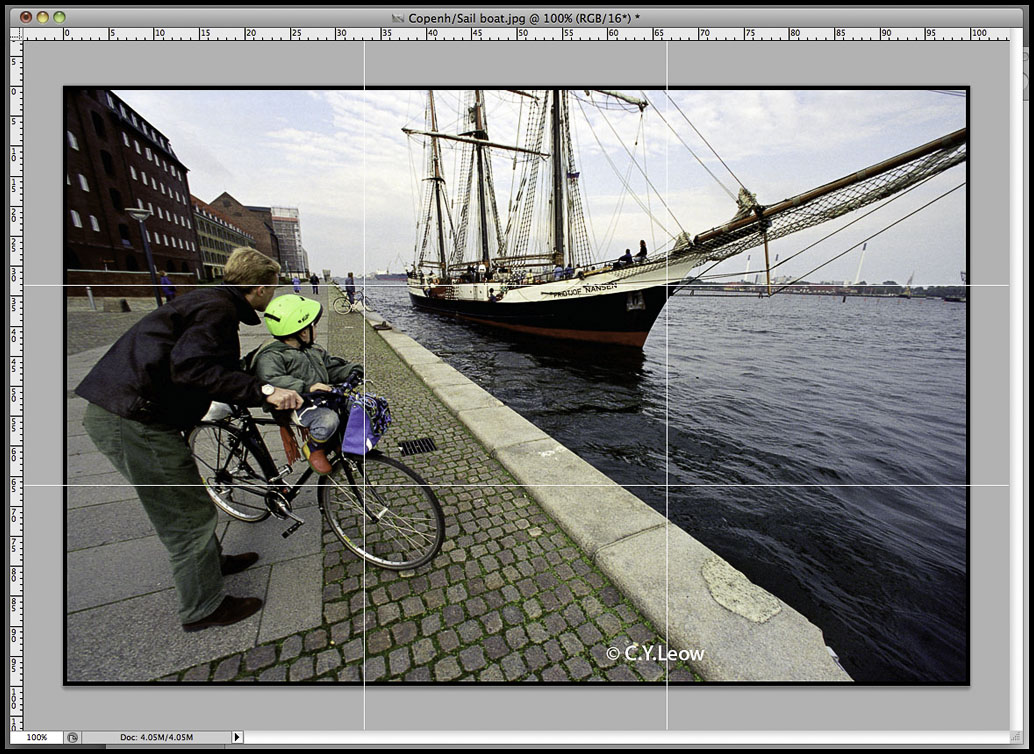
 Last week I talk about the Rules of Thirds, an imaginary two equally-spaced horizontal lines and two equally-spaced vertical lines that assists your composition.
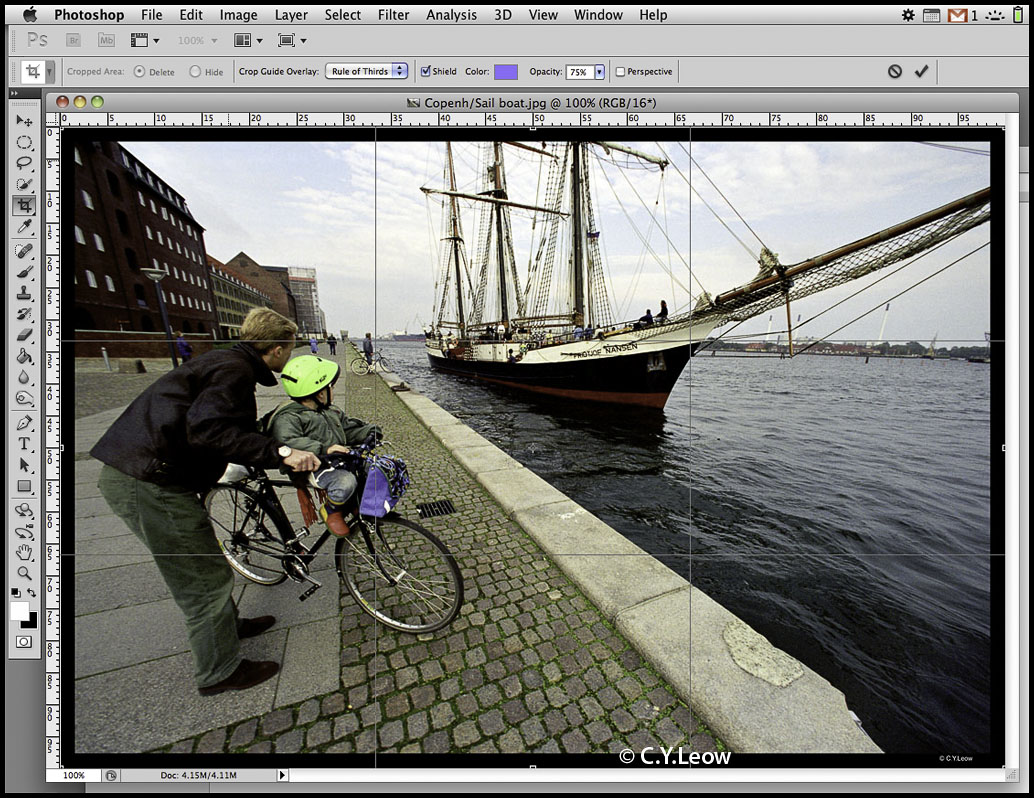
You also learned that finally even Adobe recognise the importance of The Rule of Third in photography. The crop tool in their latest Photoshop CS5 Extended will superimpose a "Third Rules" over your to be crop image, hopefully guiding you to a better composed crop.
The only problem I find about those very fine overlay lines, they are a bit hard to see; wouldn't it be nice if we can have easy to see white lines and we are able to overlay them to our image anytime we want?
You can, by creating a photoshop "action".
What is a Photoshop Action? Photoshop Actions are the recordings of commands that can be applied to an image or multiple images. When Photoshop plays an action, it applies these recorded commands to an image sequentially. You can store hundreds of useful actions on your computer and load them into Photoshop whenever you want to apply the commands applied by the action. - addictedtodesign.com
Lets start creating a "show-third-rules" action in Photoshop.
Here are the steps which all you PS-gurus might find a bit long winded, it is for the benefit of most PS users. If you are a "guru", you would have known how to create these rules; don't you? ;)
1) Open a photo, any photo; size or orientation does not matter.
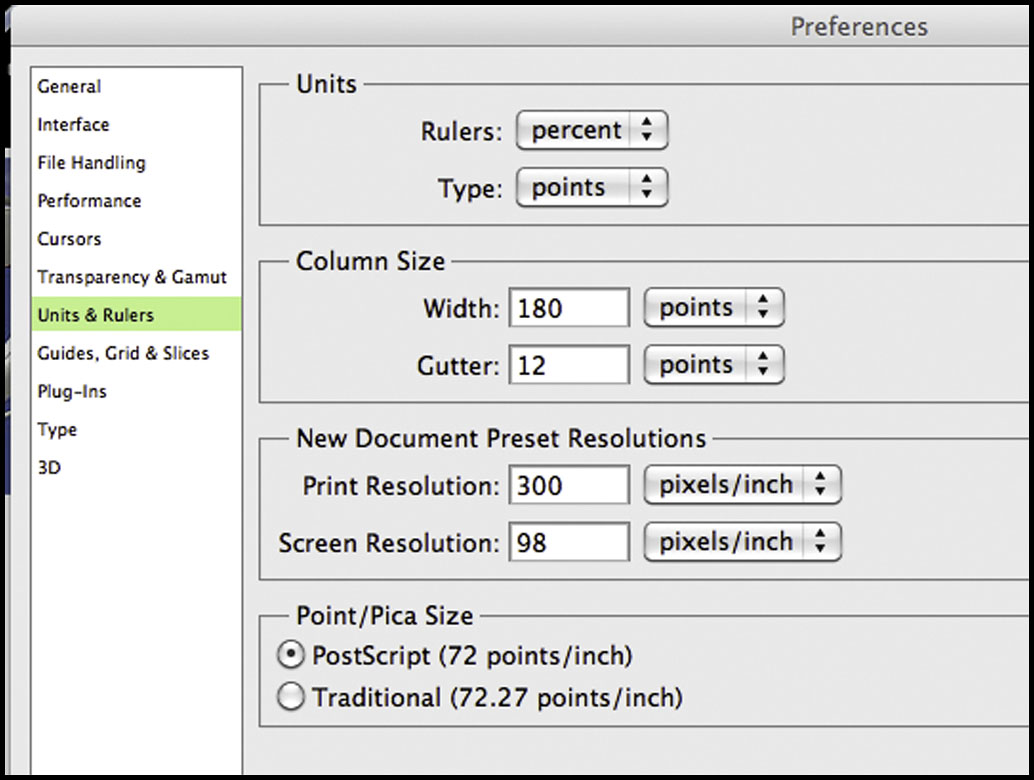 2) Go to "Preferences" - "Units and Rulers...", when the preferences window open, select "percent" for the Rulers: box. You can set it back to "mm" or "inches" afterwards. This step is important, failing to do this; you will find your rules only work for only one photo size (the one that you do the action with).
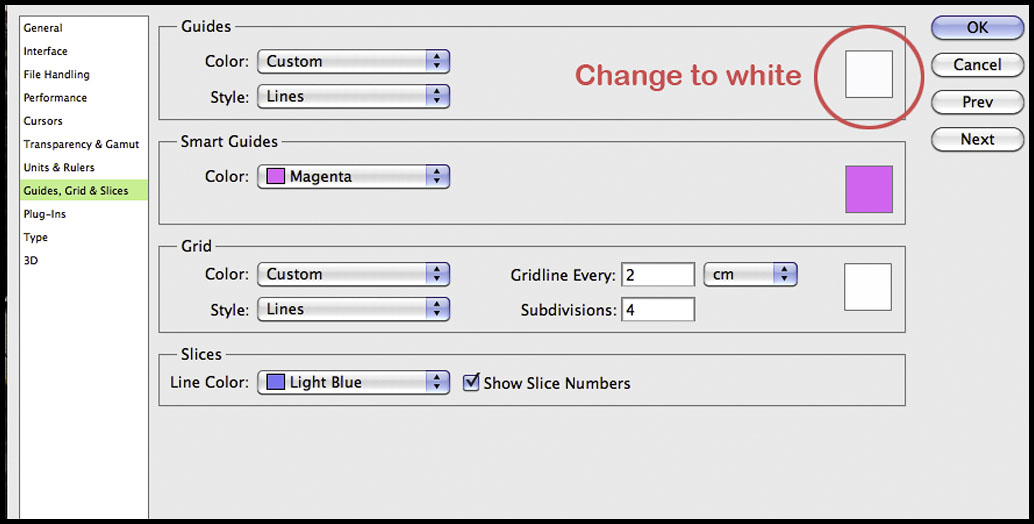 Still in the preferences window, click "Guides, Grid & Slices" and change the "Guides" box to white colour.
3) At the "Actions" palette select "New Action...", give it a name; (I named mine "make rule third") then start recording.
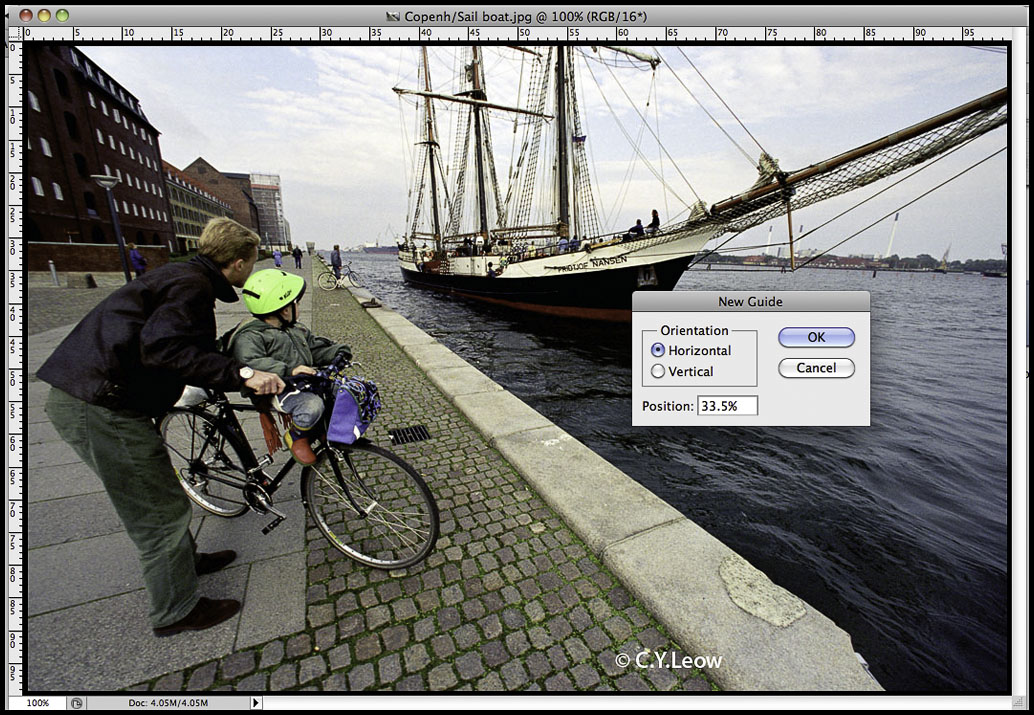
4) Go to "View" then down to "New Guide...", let go mouse.
5) At the New Guide window select "Horizontal" then at the "Position:" box type in 33.5% and click OK.
Once you do that, you should see your first horizontal white rule appear!
 6) Now go back to "New Guide" again, select horizontal again but this time type in 66.5% and click OK. Second rule line should appear.
7) Now REPEAT step 5 then step 6, this time making sure "Vertical" is selected. After you entered 33.5% then 66.5% for the next two steps, you should get the full sets of rules!
 Now stop the recording of your action. DONE!
Now anytime you open a photo and when you click and run your "make rule third" action, you get the clear, white Rule of Thirds overlay for you! The beauty of this action is that the rules will adapt to any sizes / orientations of photos!
Oh... you can easily "turn off" the overlaid rules by going to "View" and then "Clear Guides..."!
Happy guides making!
End note:
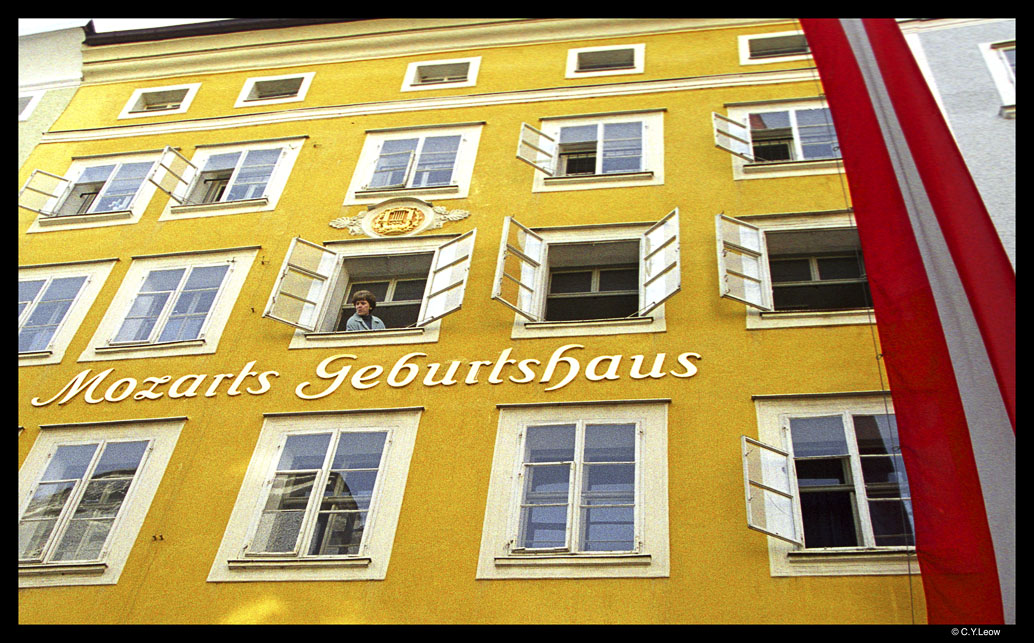 Mozart lived here...
The brightly coloured Mozart's House in Salzburg, Austria. As I was composing (pun intended), she pop her head out of the window... an added bonus! The bright red Austrian flag on the right contrast with the yellow.
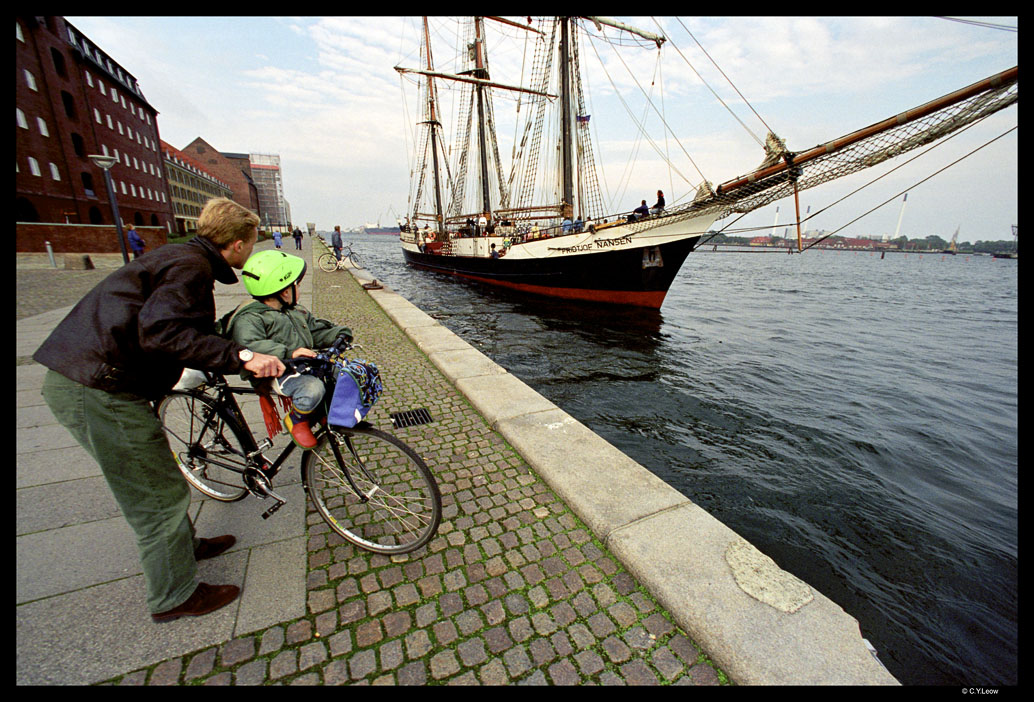 I am sailing...
Father and son admiring a boat setting sail in Copenhagen harbor. They were so absorbed by the yacht that they never noticed me running from ten yards away with my Leica to capture this shot. The Leica was so "quiet"! Leica M6 with 21mm lens.
Learn about The Rules of Thirds!
No comments:
Post a Comment